There’s no getting around it—the importance of visuals in the marketing landscape today can be the make or break factor for your brand. Luckily, taking great photos is now easier than ever.
Before the Smartphone era, being able to capture a high-quality photo was strictly for the pros. This often required buying and using pricey cameras, lenses, editing software, and storage devices. Even after buying all of the necessary equipment, there was a pretty steep learning curve in order to capture a great picture.
Today, with the rapid improvement of our mobile device’s camera and accompanying editing apps, we all have the power to take, edit, and use beautiful, high-quality images anywhere, anytime.
But, while having a powerful camera on your smartphone makes photography more accessible than ever before, there is still more to taking a great photo than simply pointing and shooting.
Here are 5 easy tips on how to take great photos with your phone:
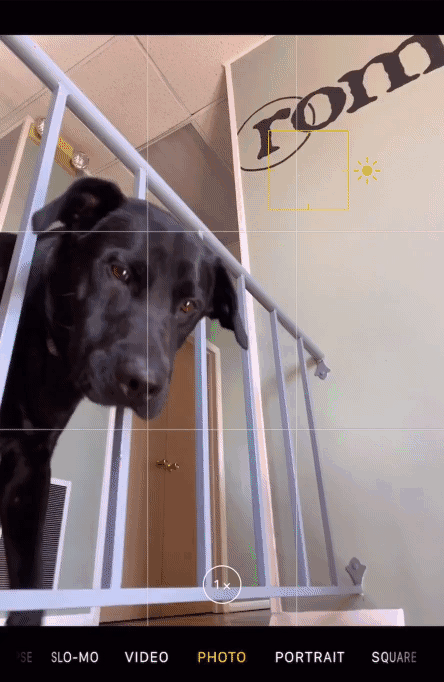
1. Use the Grid
First things first, turn on and use the grid on your phone’s camera. By doing so, your camera will now display superimposed gridlines which make up a 3×3 – 9 section grid.
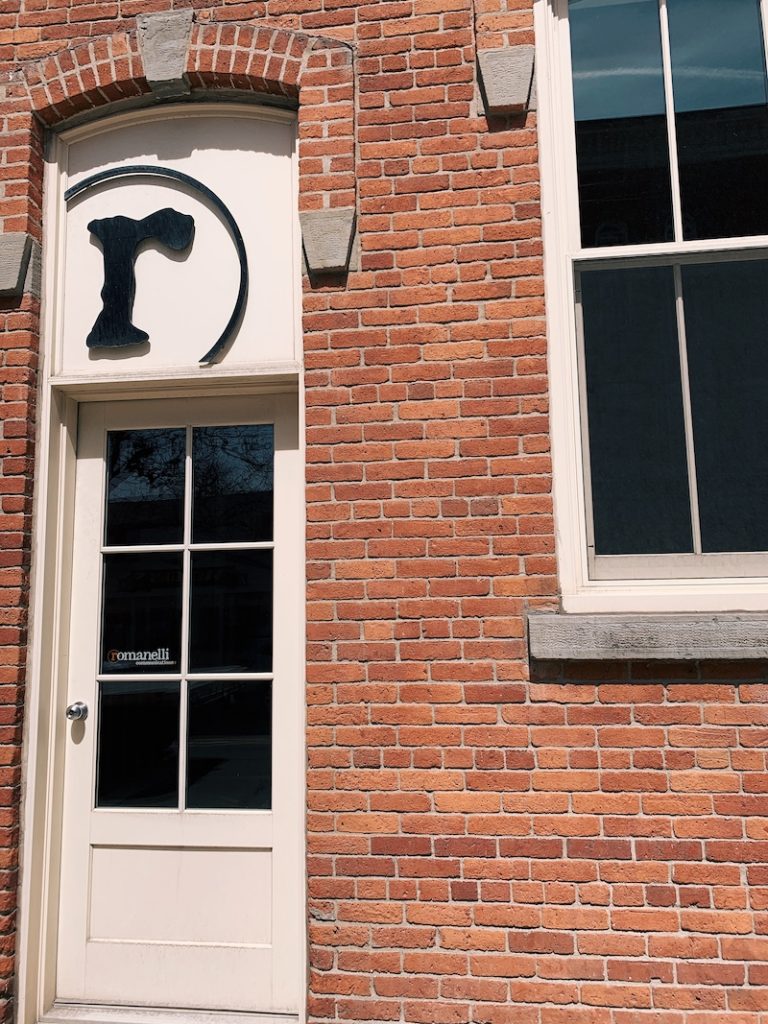
This will now allow you to apply the “rule of thirds” to your photos: a composition technique in which an image should be broken down into thirds to create a more balanced and visually appealing photo.
Here’s an example:

How to turn your camera’s grid on:
- iPhone: Camera > Toggle “Grid” on
- Android: Open the Camera app > Settings > Toggle “Grid Lines” on
2. Manually Focus
By default, your phone’s camera will autofocus on the foreground of your current frame. However, this does not always give you the best possible focus for all of your photos. Before taking a photo, tap on where you would like the focus to be to ensure your subject gets as much focus as possible.

3. Perspective/Angle
Ask any avid Instagram user and they’ll tell you taking a great photo is all about getting the right angle. Don’t just take 1 photo! Experiment with your subject by taking multiple photos from all different types of angles. Then, decide which one looks the best afterwards. You never know what you may end up with.


4. Don’t Zoom In!
Big, big, big no-no! While you may be tempted to zoom in on a subject that is far away, it is best to refrain from doing so. By zooming in, you are pushing your phone’s camera limits, resulting in a more pixelated/blurry photo.
Instead, try physically moving the camera closer to your subject, or do some post-editing to carefully crop the photo and remove unwanted background noise.


5. Use Natural Light (if possible)
The most underrated tip of them all: Use natural light whenever possible! Too many times our photos are victims of poor lighting which can result in an over/under exposed and an overall crappy looking photo. The more natural light your phone’s camera is able to absorb, the better chance you have of taking a quality image.
Do your best to find the natural lighting around you (Hint: Use the sunlight). Doing so will drastically increase the quality of your photos, as well as having the ability to play with shadows and contrast.

(Hear what his dog has to say about him)